End-to-End Pipeline Example on Azure
Introductions
Overview of Azure and AKS
Microsoft Azure is an open, flexible, enterprise-grade cloud computing platform running on Microsoft infrastructure. The platform has various services, many of which are extremely useful in a pipeline that works with ML models.
The Azure CLI is a set of tools that you can use to interact with Azure from the command line.
Azure Kubernetes Service (AKS) on Azure allows you to deploy containerized applications, within which you describe the resources your application needs, and AKS will manage the underlying resources automatically. This workflow is especially efficient at scale.
The overall workflow
This guide takes you through using your Kubeflow deployment to build a machine learning (ML) pipeline on Azure. This guide uses a sample pipeline to detail the process of creating an ML workflow from scratch. You will learn how to create and run a pipeline that processes data, trains a model, and then registers and deploys that model as a webservice.
To build your pipeline, you must create and build containers using Docker images. Containers are used to abstract the dependencies for each step of the pipeline. You can manage your containers using Azure’s portal, specifically using the Container Registry to store the containers in the cloud. Kubeflow pulls the containers from this registry as they are needed in each step of the pipeline.
By following this guide, you will learn how to:
- Set up Kubeflow in an AKS Cluster
- Create and compile a pipeline that can:
- Preprocess data
- Train a model
- Register the model to ACR (Azure Container Registry)
- Profile the model to optimize compute resources in AML (Azure Machine Learning)
- Deploy the model to AML
- Interact with and customize your deployment
- Test and use your deployed model
When your pipeline has finished running, you will be able to see a registered image, model, and deployment in your Azure ML workspace. You will then be able to visit the scoring URI and upload images for scoring in real time.
Set up your environment
Download the project files
This tutorial uses the Azure Pipelines example in the Kubeflow examples repo. You can optionally use a pipeline of your own, but several key steps may differ.
Clone the project files and go to the directory containing the Azure Pipelines (Tacos and Burritos) example:
git clone https://github.com/kubeflow/examples.git
cd examples/pipelines/azurepipeline
As an alternative to cloning, you can download the Kubeflow examples repository zip file.
Deploy Kubeflow
If you don’t already have one, create an Azure account. If you have not used Azure services before, you can receive up to 1 year of free services and free credits.
Note: that some of the services used in this guide may not be included in the free services, but can be covered by free credits.
First, install the Azure CLI, then follow the instructions in the guide to deploying Kubeflow on Azure.
Ensure that the agent size you use has the proper memory and storage requirements. For the Azure Pipelines example, most machine sizes will work, but premium storage is required. Use this guide to choose the right agent size for your deployment. (We chose an agent size of Standard_D4s_v3.)
Configuring Azure resources
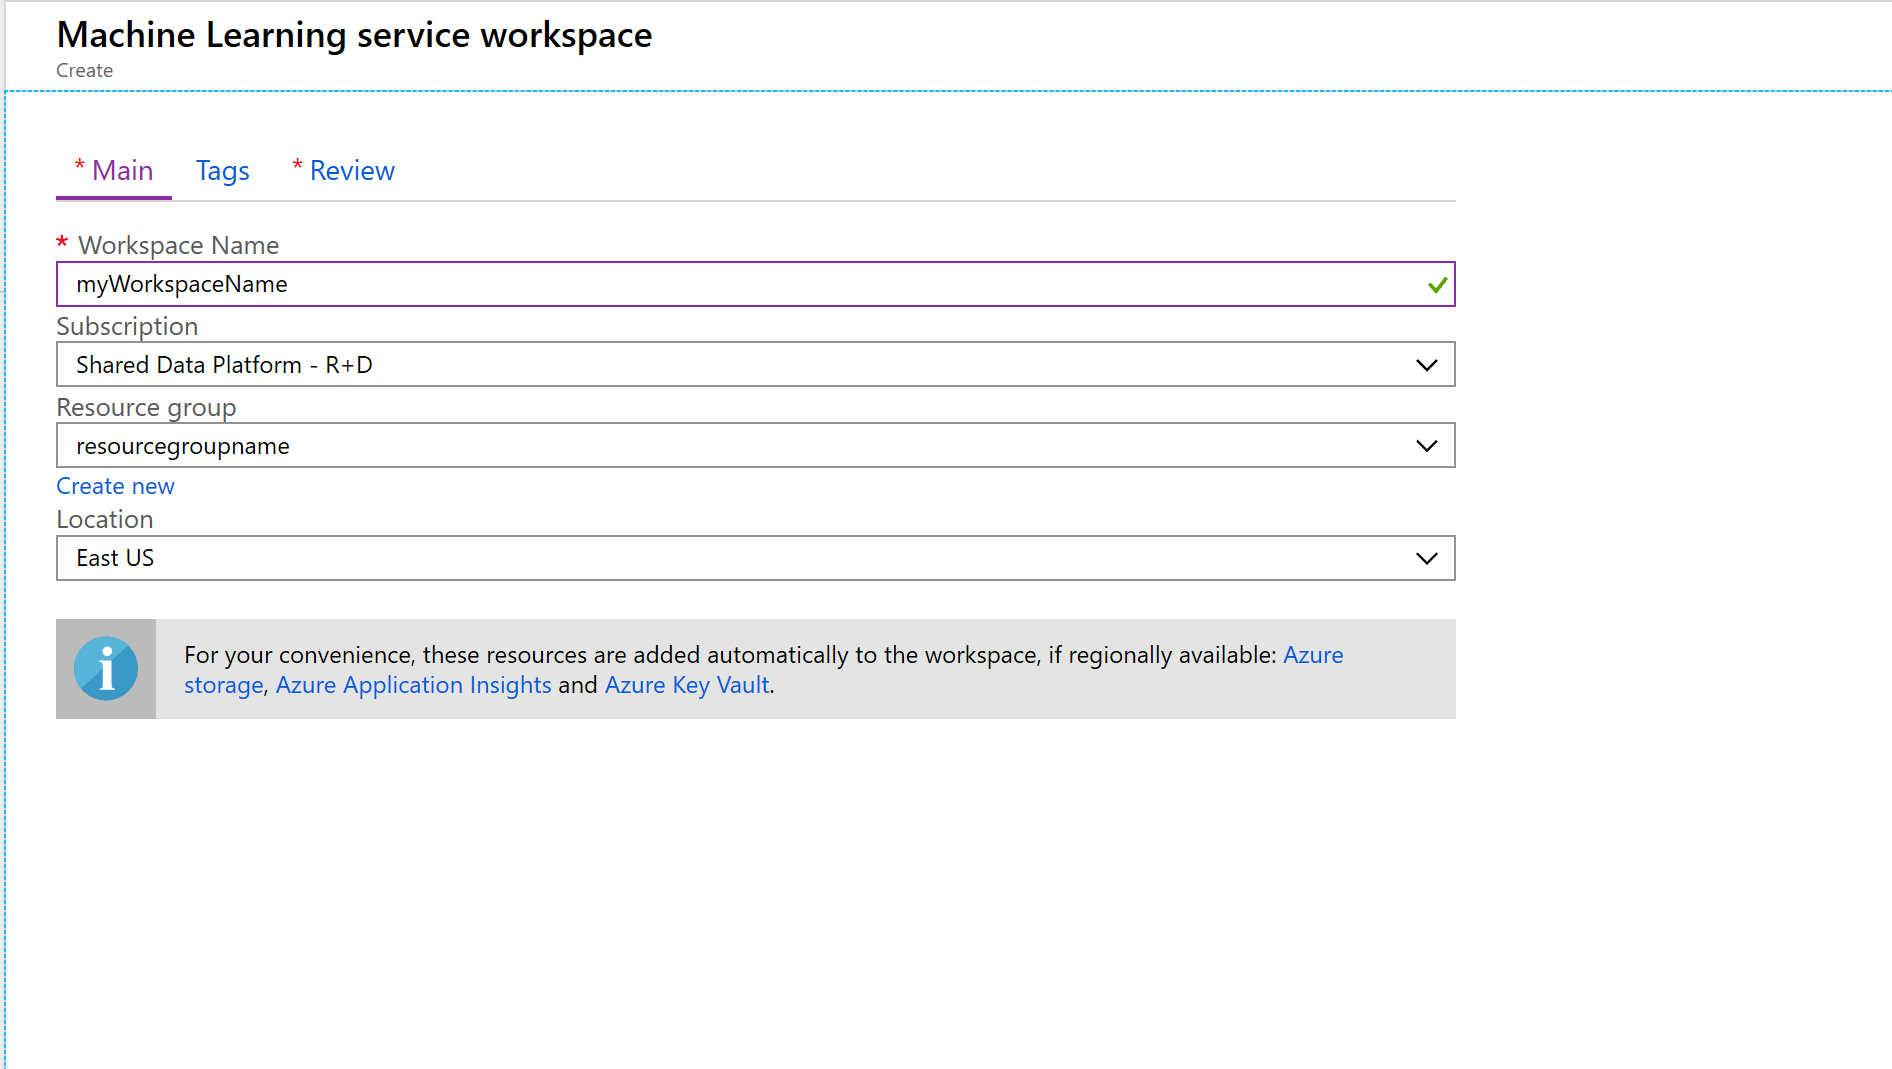
Create an ML workspace in Azure
Throughout your pipeline’s run, all of your models, images, and deployments will be pushed to your ML workspace in Azure. Your ML workspace also has support for managing your active deployments, which will be displayed later in this tutorial.
To create an ML workspace:
- Go to the Azure portal and click on your resource group.
- Select the add a new resource option.
- Search for Machine Learning Studio Workspace and use the default options, taking note of the name you decide for it.
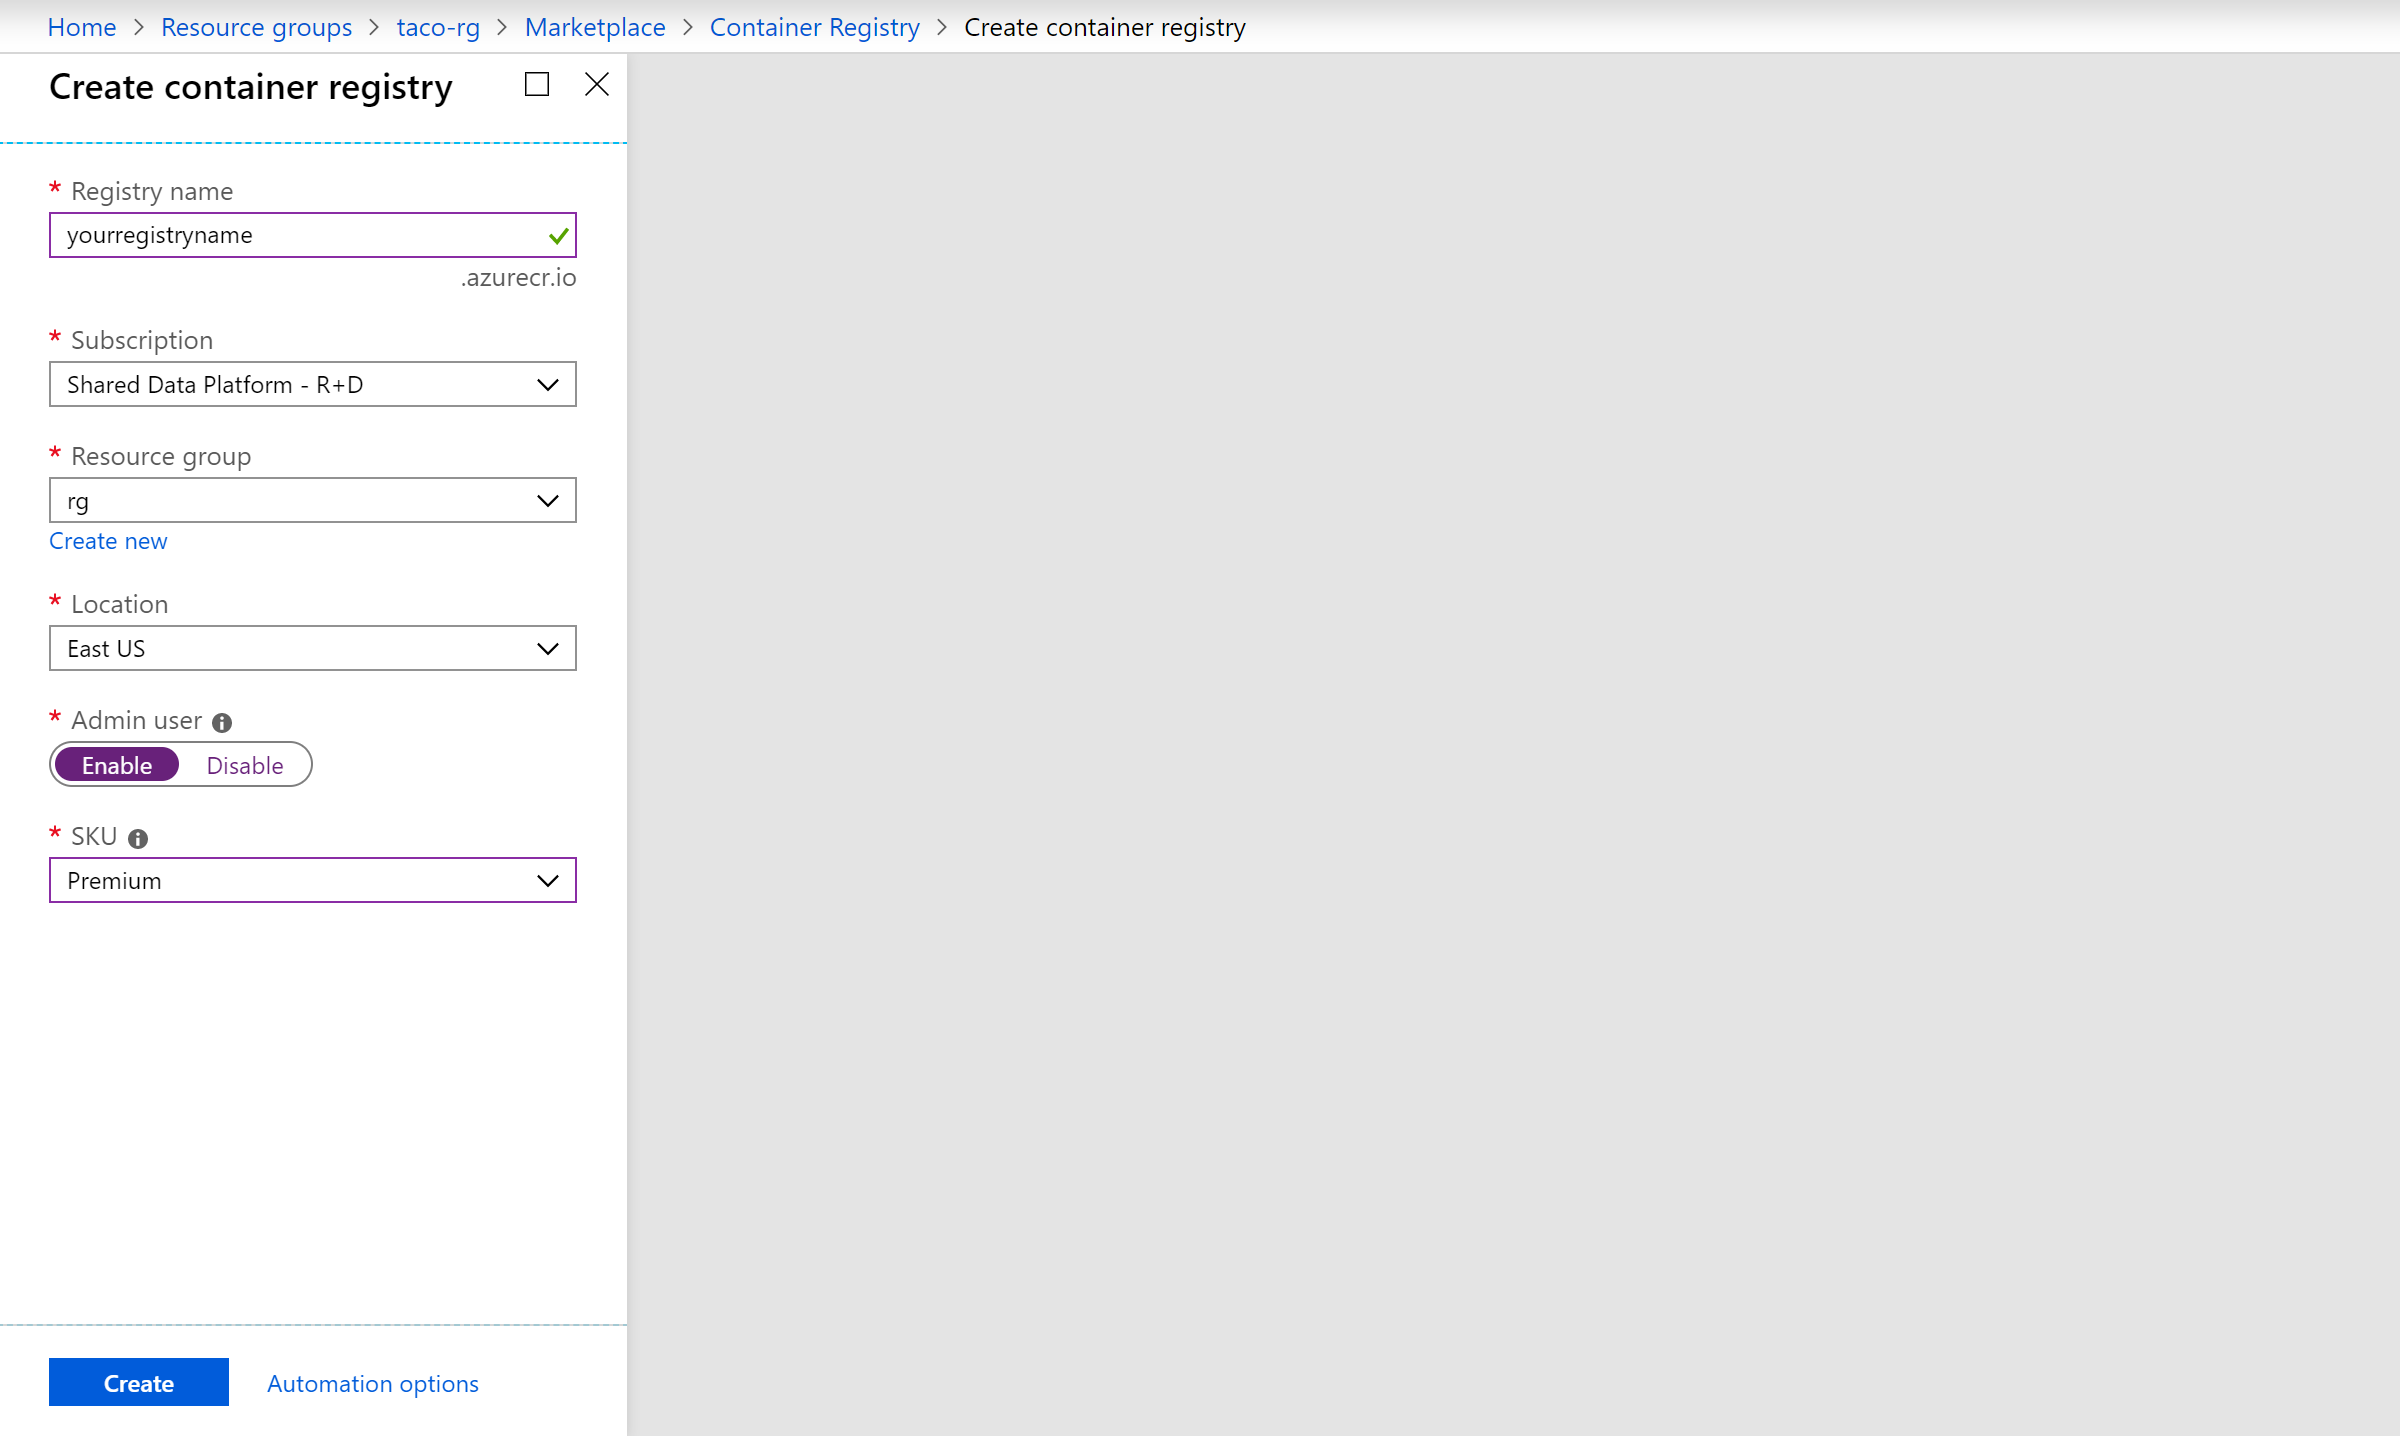
Create an Azure container registry
Kubeflow uses Docker images to describe each pipeline step’s dependencies. You need to create a container registry to store those images in the cloud so that Kubeflow can pull the images as they are needed.
To create a container registry:
- Go to the Azure portal and click on your resource group.
- From there, select the add a new resource option.
- Search for Container Registry and add it to your resource group.
- Configure your registry by selecting and noting the name you use for it. Enable an admin user, and change the SKU option to Premium.
Allow your AKS Cluster access to your Azure Container Registry
In order for the AKS cluster to have access to pulling images created for execution of the pipeline, you will need to update your cluster so that it is able to pull the images from the container registry we just created. More references can be found here, on the Microsoft web site.
Using a bash shell, use the following commands to attach the container registry created above to your AKS cluster, using the proper AKS cluster name and resource group:
az aks update -n <myAKSCluster> -g <MyResourceGroup> --attach-acr <REGISTRY_NAME>
The execution of the command will take a few minutes.
Create a persistent volume claim (PVC)
A persistent volume claim is a dynamically provisioned storage resource attached to a Kubernetes cluster. It is used in the pipeline to store data and files across pipeline steps.
Using a bash shell, navigate to the azurepipeline directory. Use the following commands to create a persistent volume claim for your cluster.
cd kubernetes
kubectl apply -f pvc.yaml
Authenticate your service principal
A service principal is used to allow your pipeline to securely interface with your Azure services without having to directly login in the pipeline and use admin privileges. To create a service principal with Contributor access to your Azure account, use the following steps.
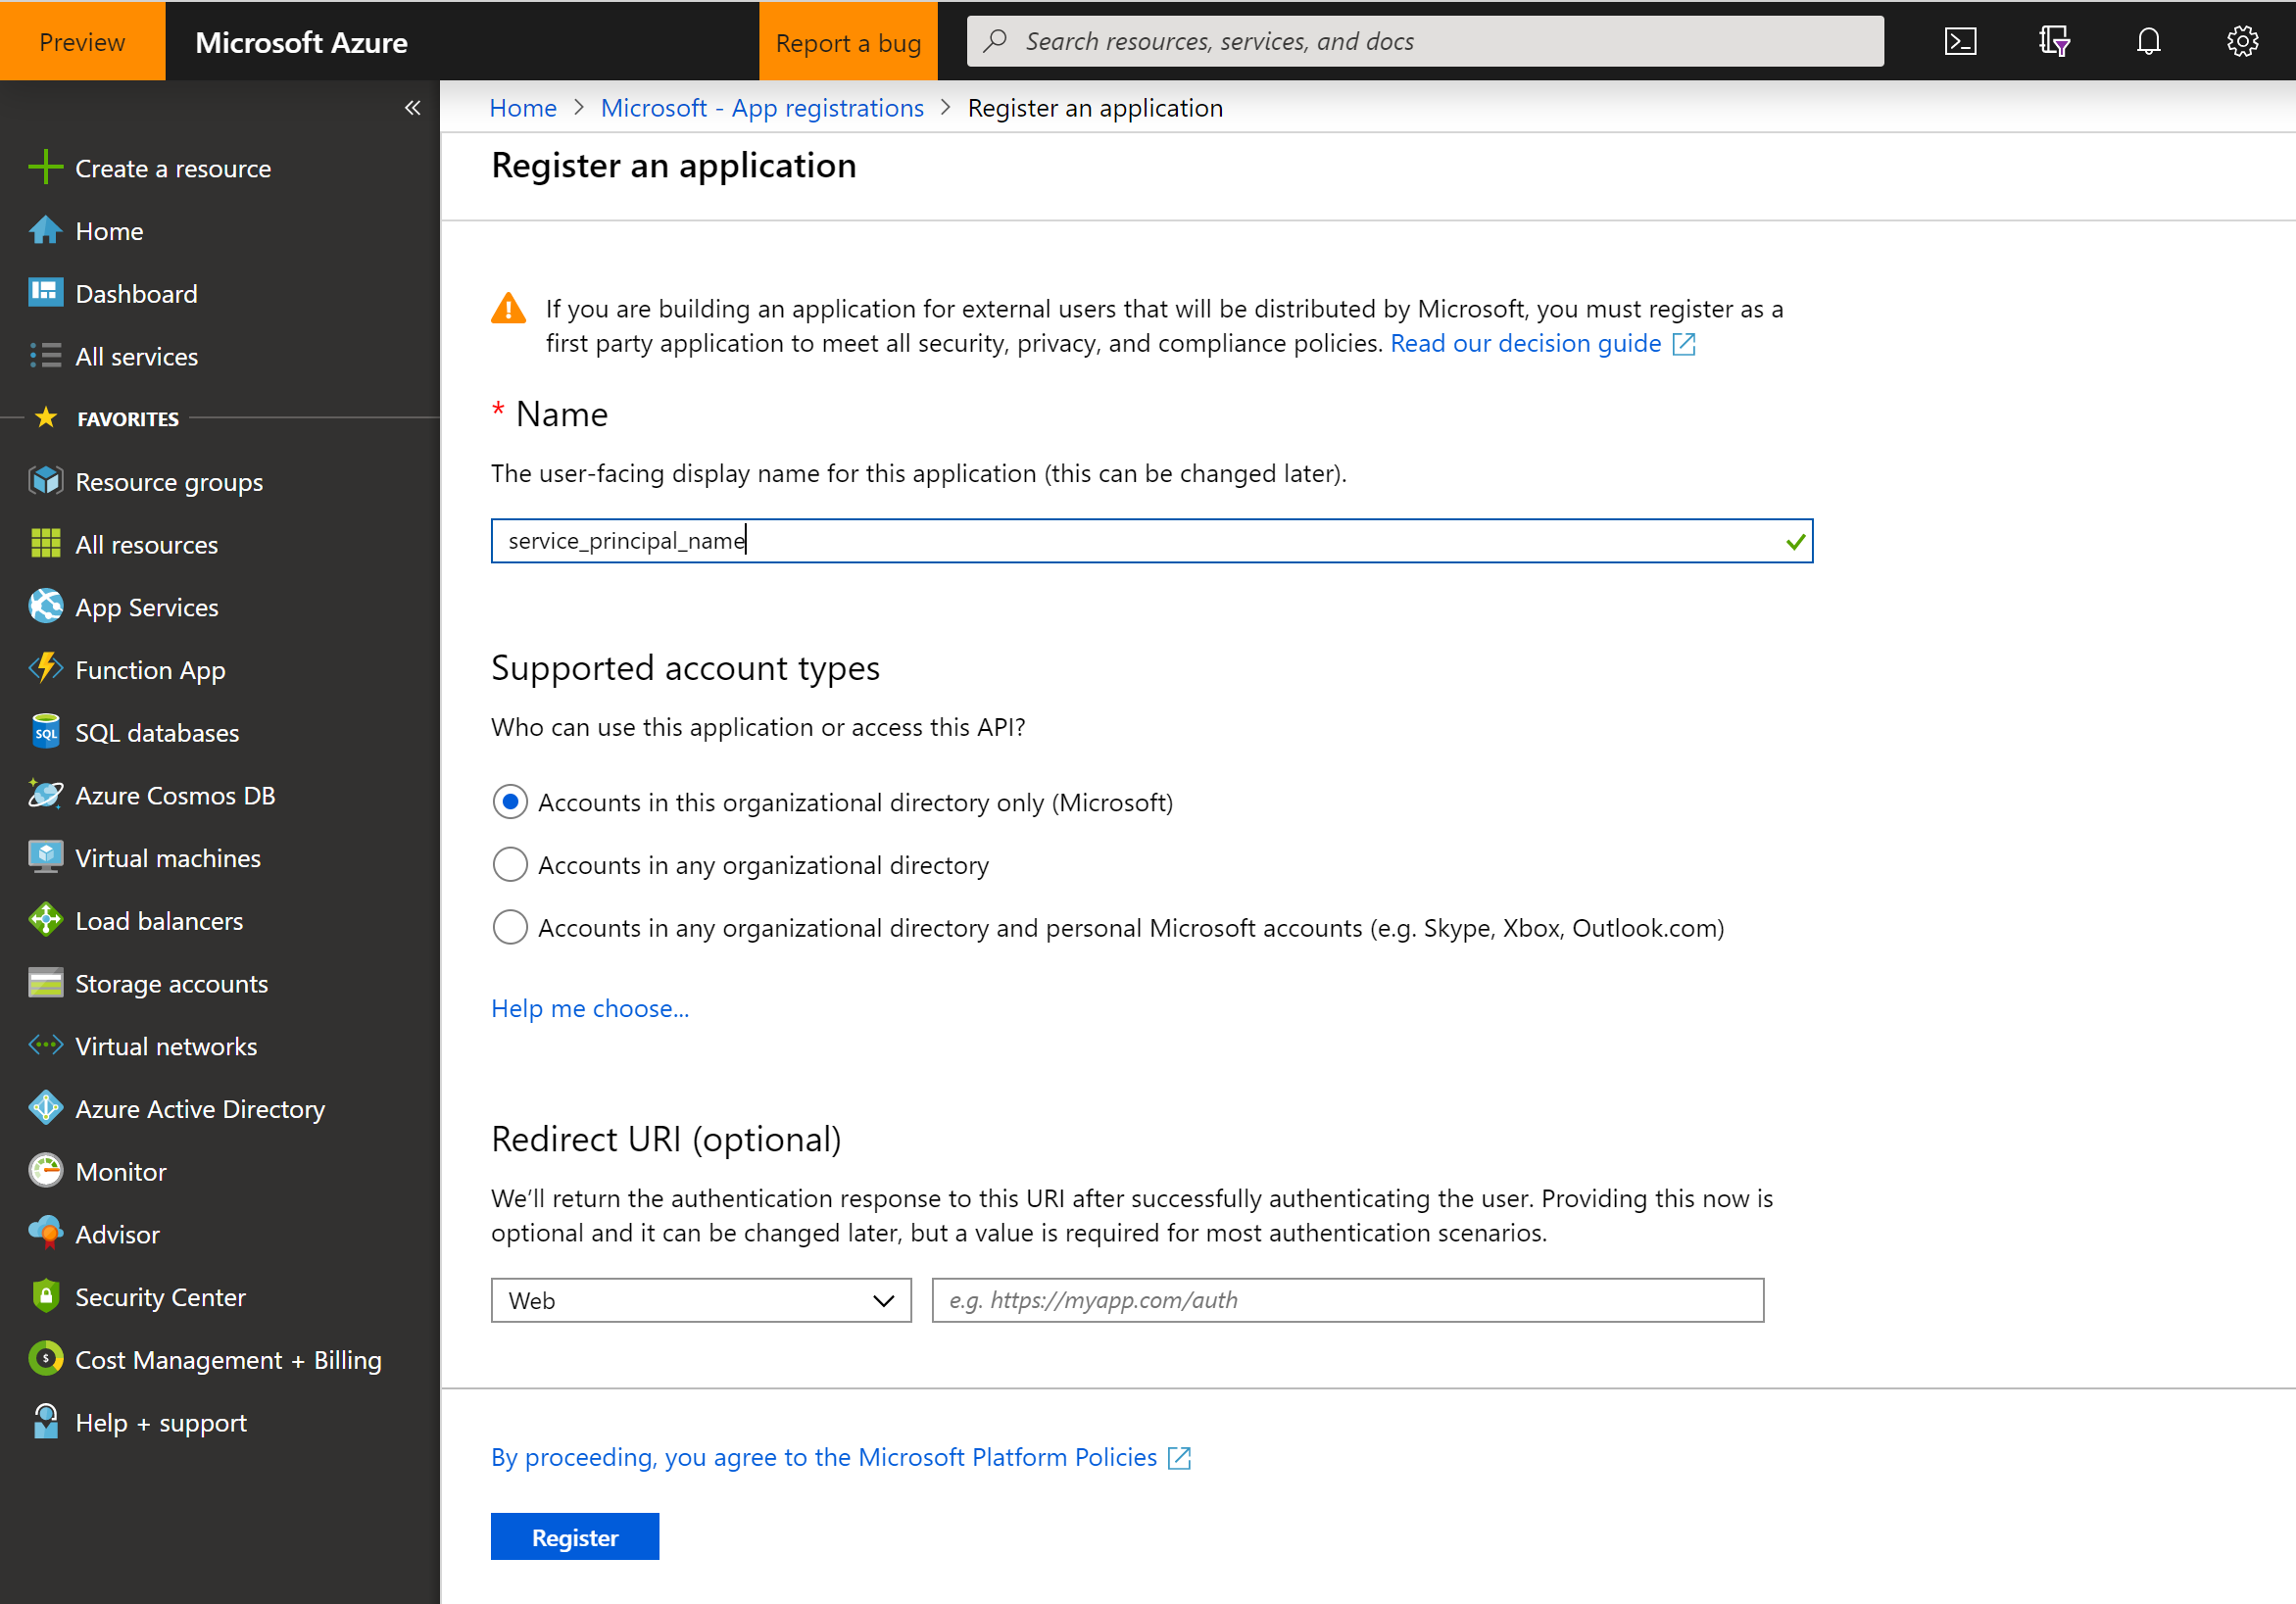
Create an App Registration
To create an app registration:
-
In the Azure Portal, navigate to Azure Active Directory.
-
Select App registrations and click New registration. Name it, noting the name and use the default options.
-
Click Register.
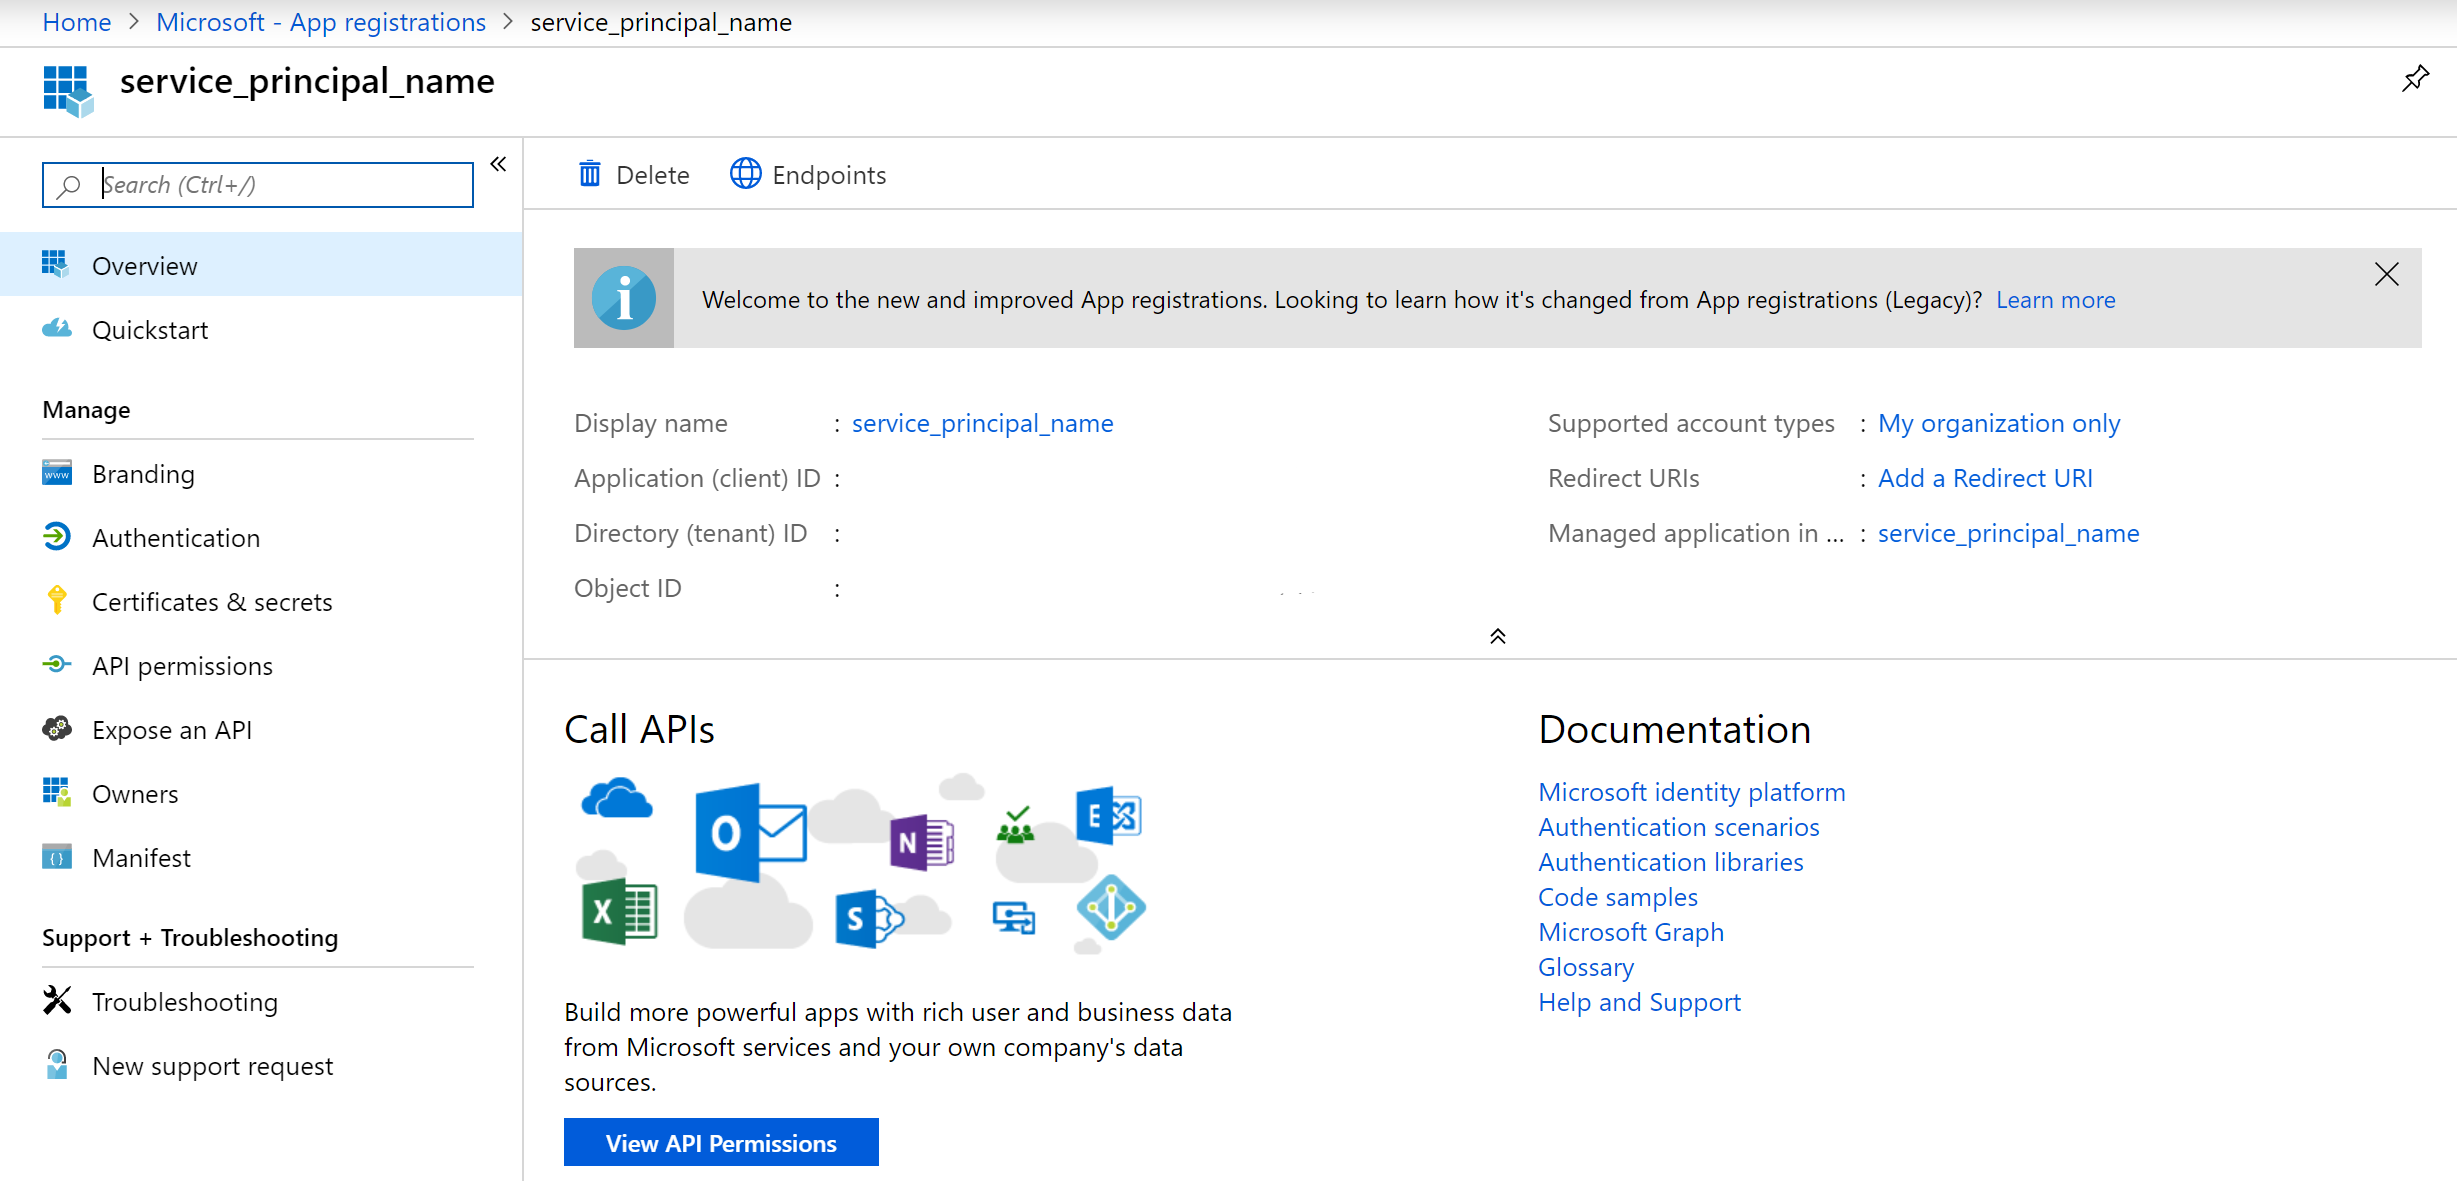
-
You should be redirected to your app registration’s dashboard. Select Overview from the sidebar.
-
Make note of the Application (client) ID and the Directory (tenant) ID. The client ID is your service principal username. Save these in a secure location.
-
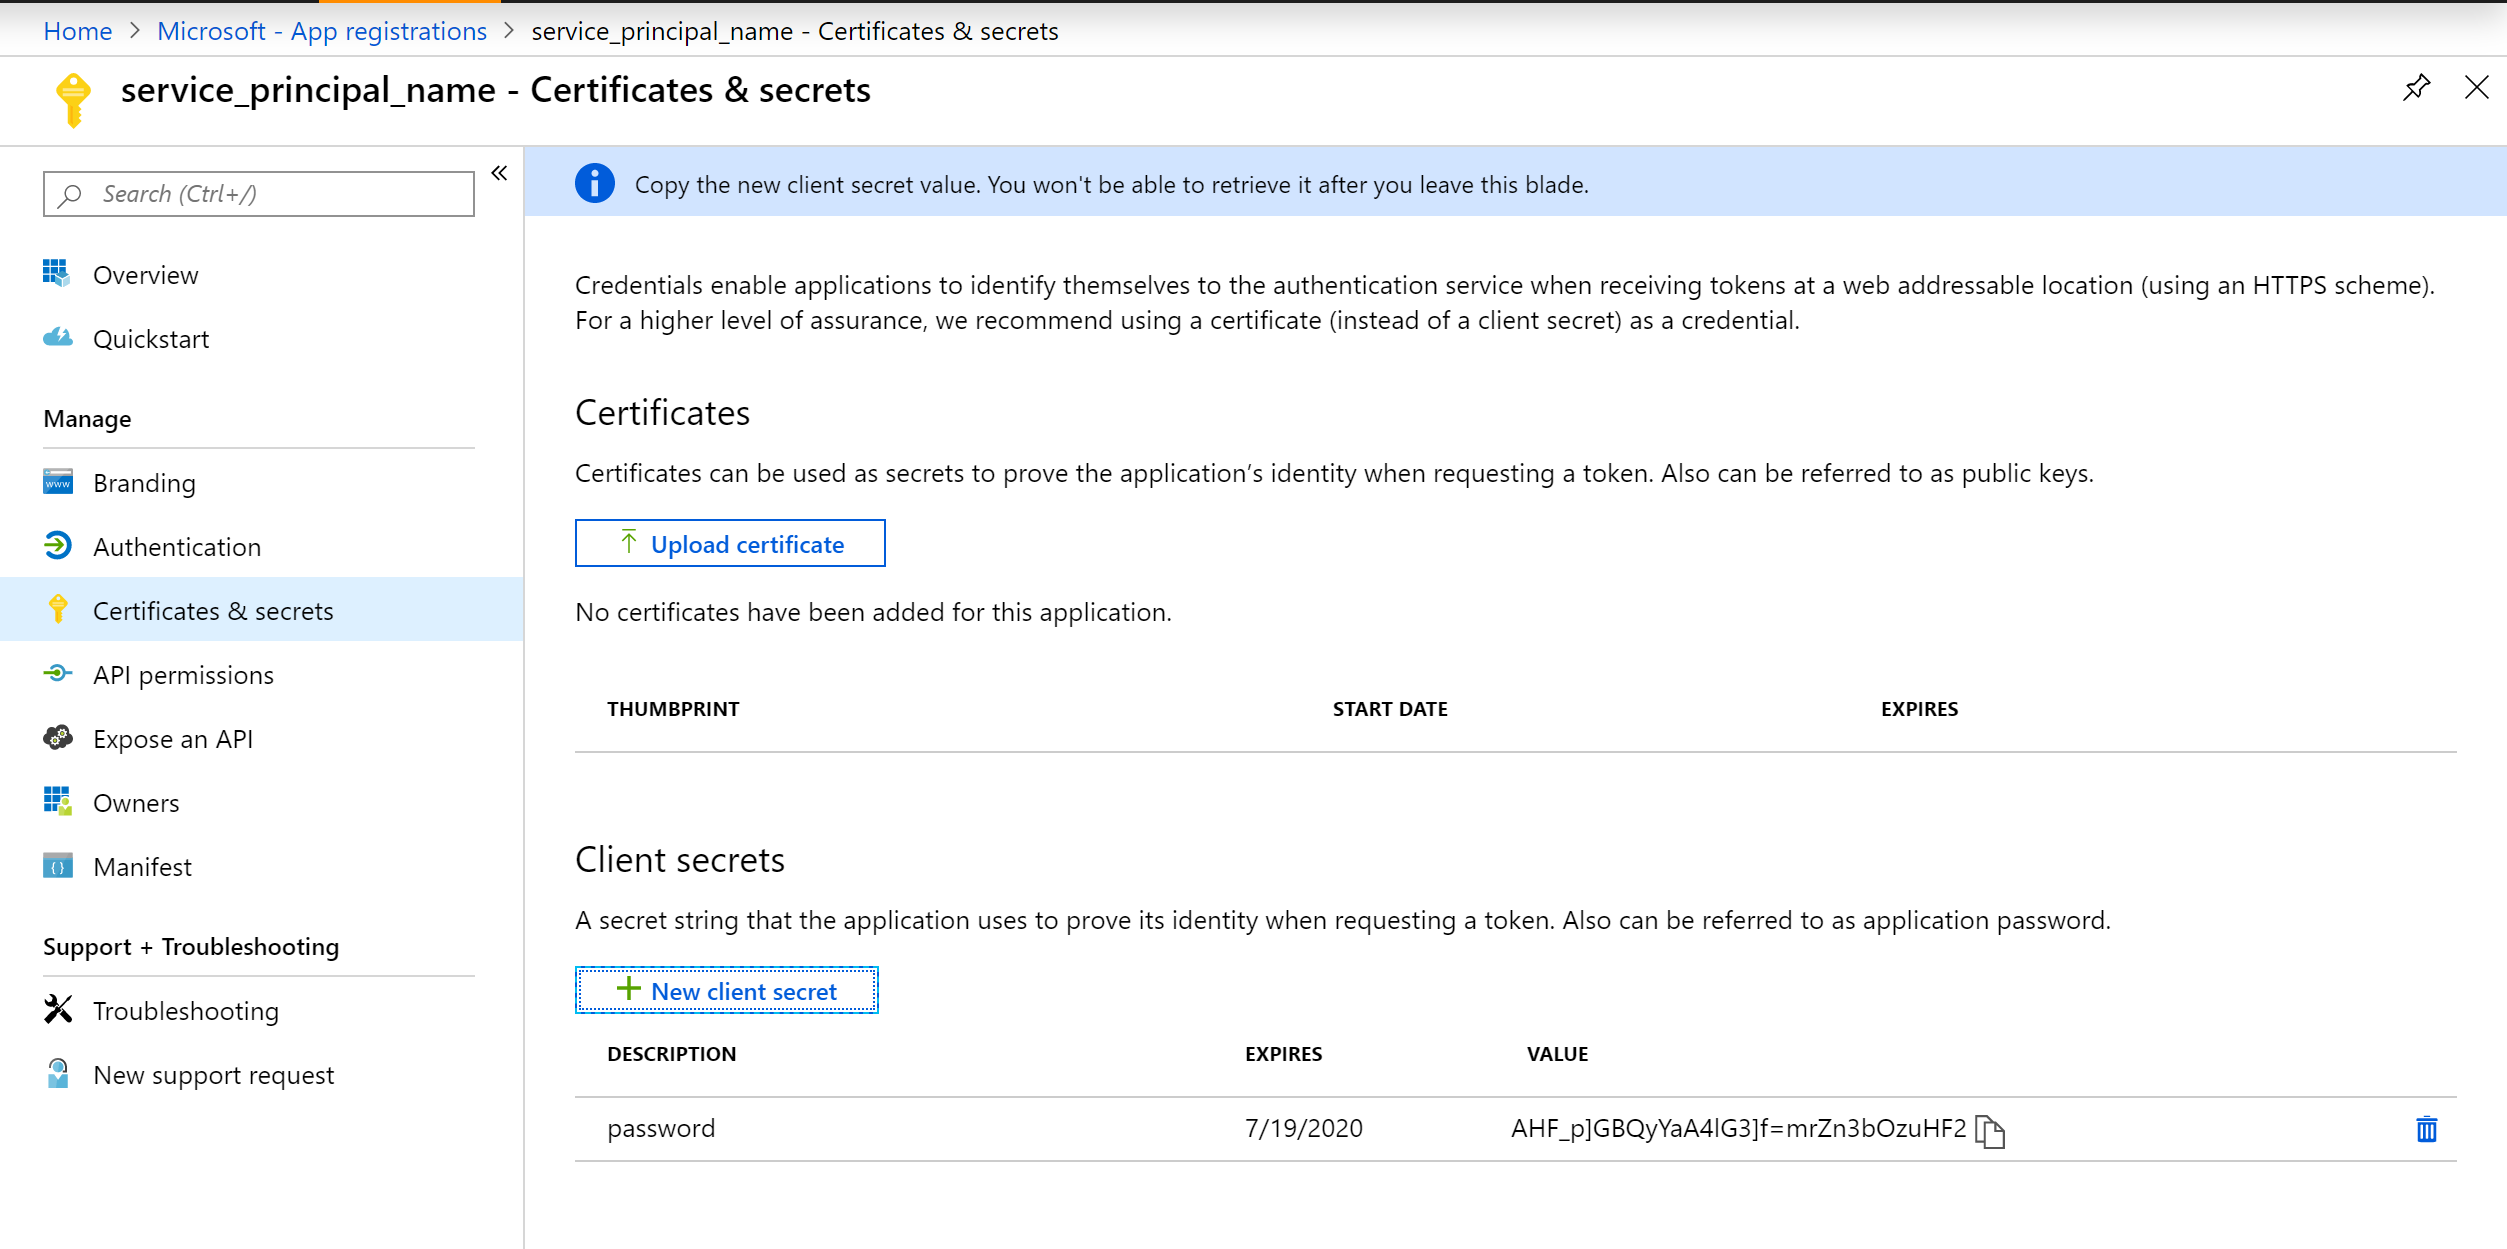
Select Certificates and Secrets from the sidebar.
-
Select New client secret. Give the client secret a description and select how long you would like it to remain active for. Once you click the Add button, make sure you take note of the client secret value and save it in a secure place. This is your service principal password.
Add a role assignment
To add a role assignment for your service principal:
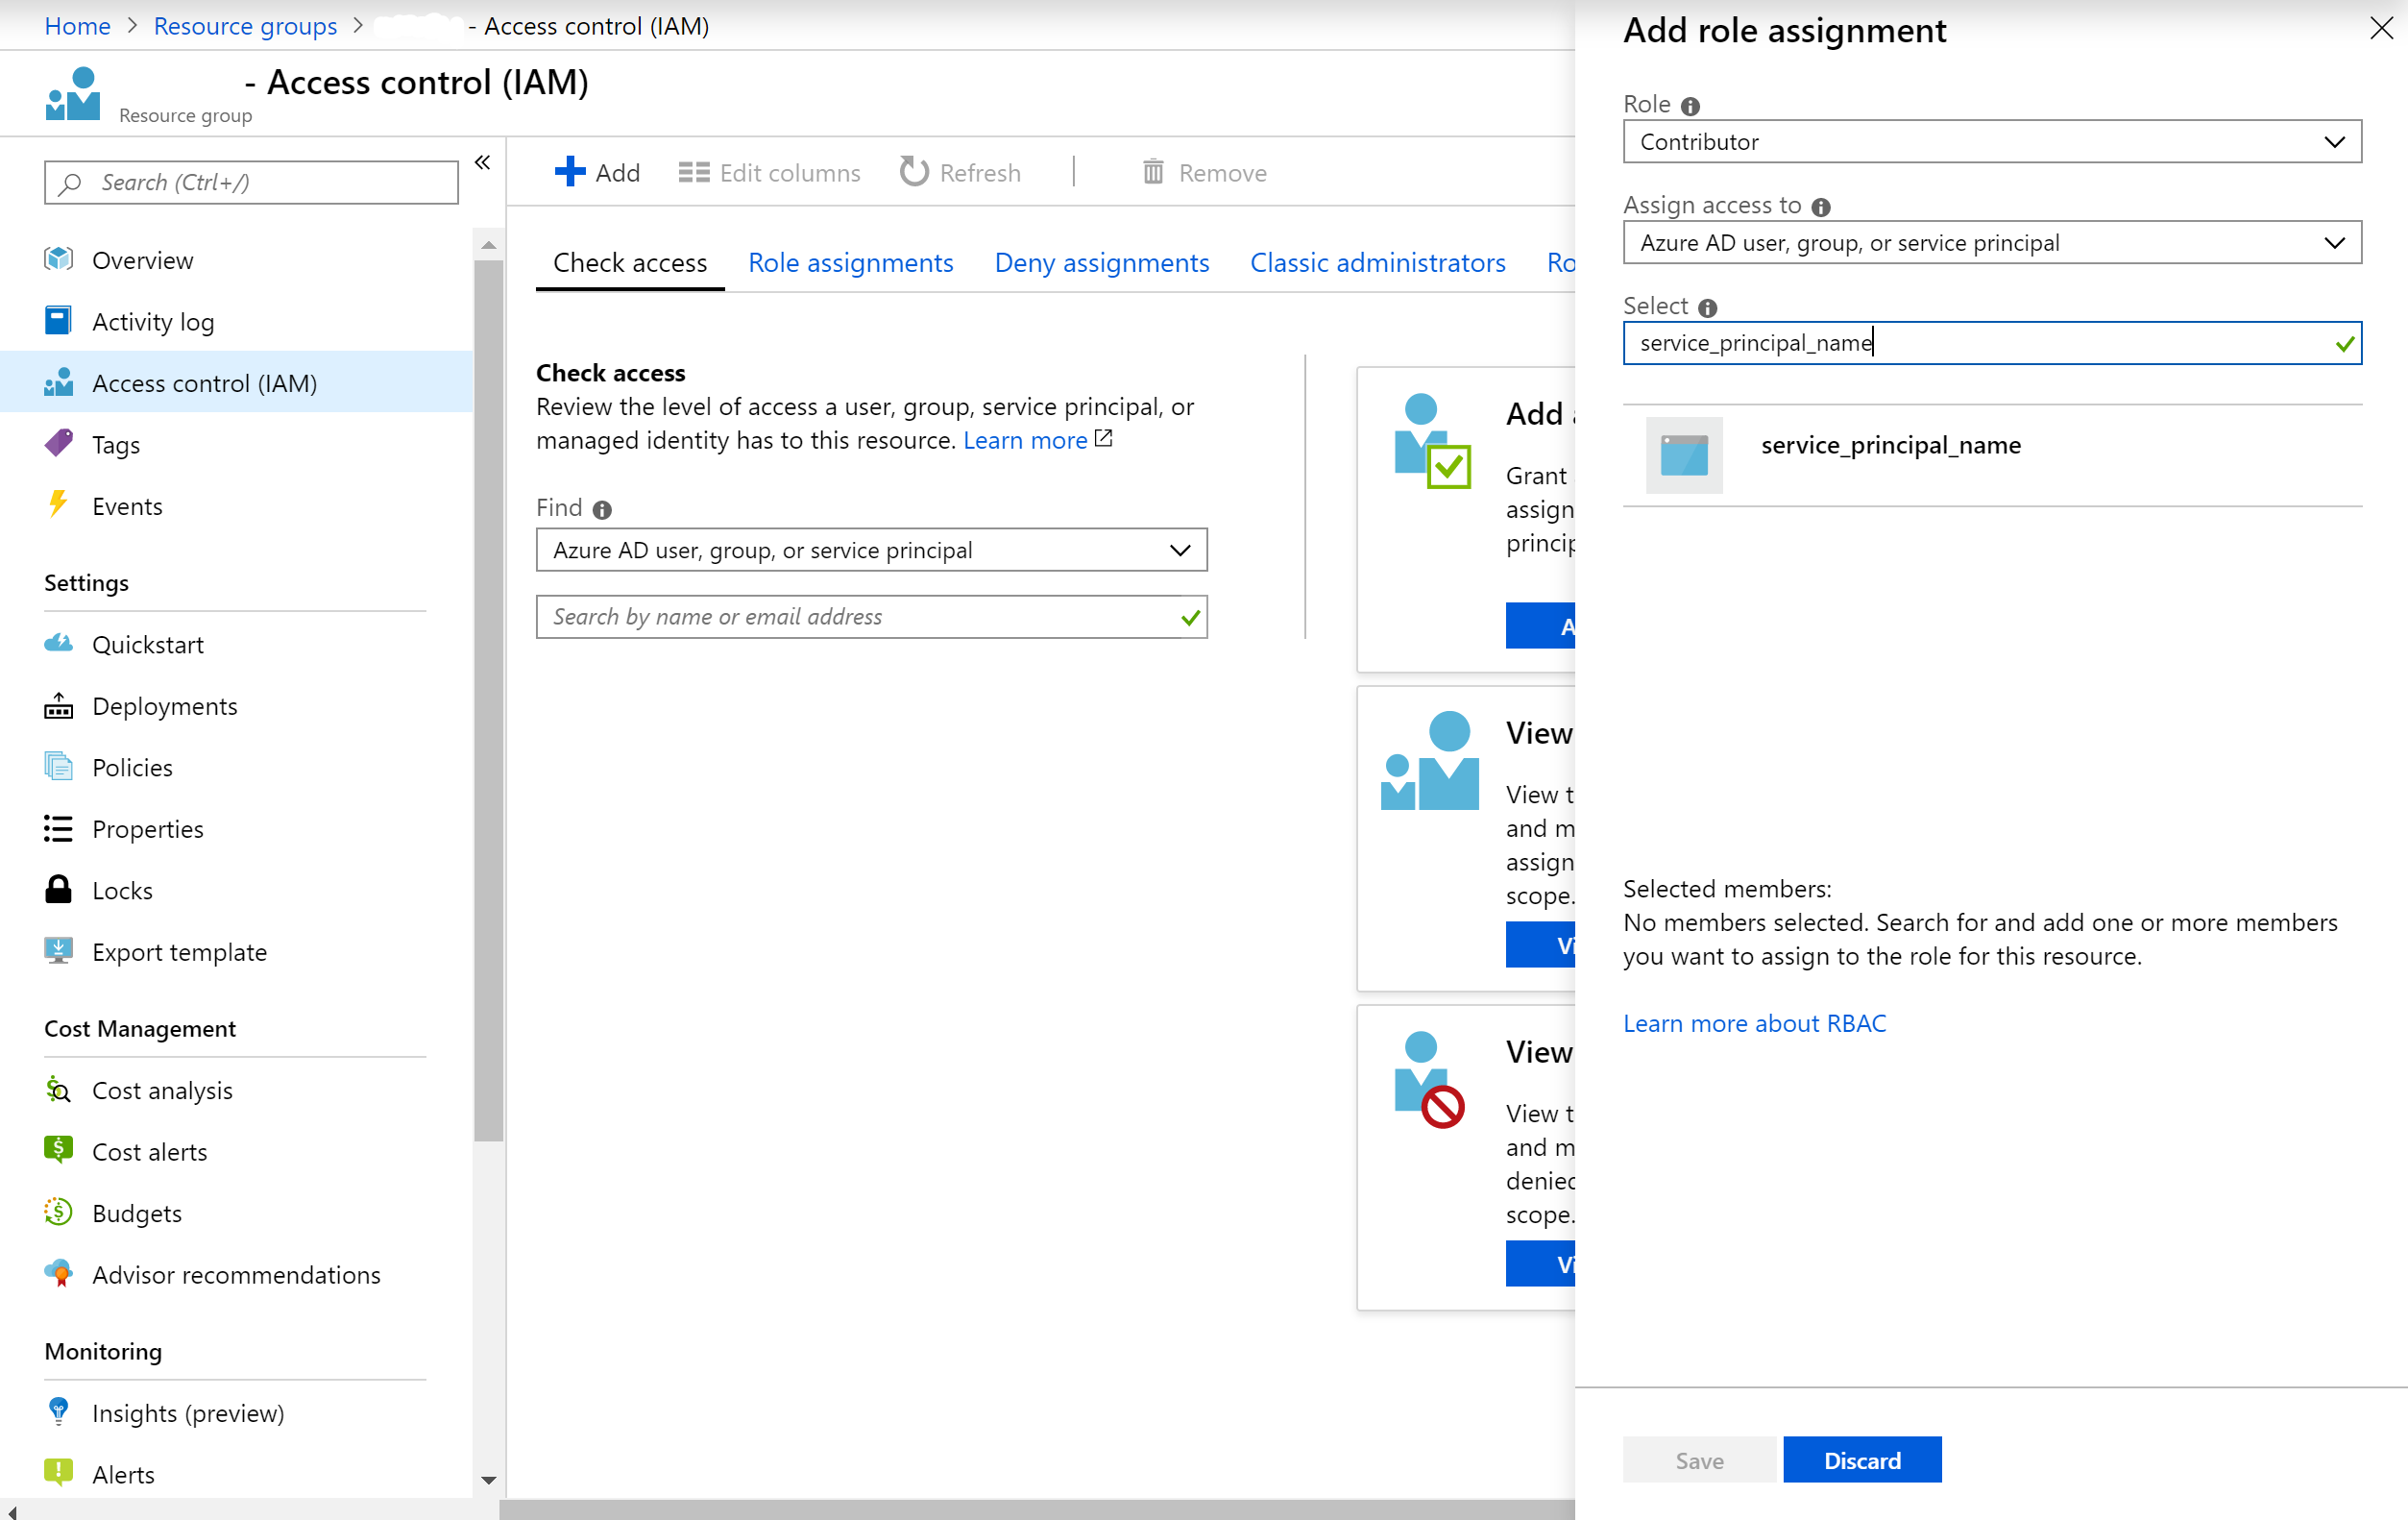
- Go to your resource group page on the Azure Portal.
- Select Access control (IAM) from the sidebar. Select Add a role assignment.
- Set the role to Contributor and search for the name you gave your app registration in the Select dropdown.
- Click Save.
Creating containers from Docker images
Install Docker
You need to install Docker to be able to push and pull images to/from your Container registry.
For Windows and WSL: Guide
For other OS: Docker Desktop
Build images
To deploy your code to Kubernetes, you must build your local project’s Docker images and push the containers to your Container Registry so that they are available in the cloud.
- Set the path in Container Registry that you want to push the containers to:
export REGISTRY_PATH=<REGISTRY_NAME>.azurecr.io
- Run the following command to authenticate your Container Registry:
az acr login --name <REGISTRY_NAME>
- Create a version, to be associated with your model each time it runs (change this accordingly):
export VERSION_TAG=1
Each docker image will be built and uploaded to the cloud using the Container Registry.
Note: If you would like to test a container locally, you can use the
docker run -it ${REGISTRY_PATH}<CONTAINER NAME>:$(VERSION_TAG}before pushing to Container Registry.
//Starting in the 'code' directory of the azurepipeline folder

cd preprocess
docker build . -t ${REGISTRY_PATH}/preprocess:${VERSION_TAG}
docker push ${REGISTRY_PATH}/preprocess:${VERSION_TAG}

cd ../training
docker build . -t ${REGISTRY_PATH}/training:${VERSION_TAG}
docker push ${REGISTRY_PATH}/training:${VERSION_TAG}

cd ../register
docker build . -t ${REGISTRY_PATH}/register:${VERSION_TAG}
docker push ${REGISTRY_PATH}/register:${VERSION_TAG}

cd ../deploy
docker build . -t ${REGISTRY_PATH}/deploy:${VERSION_TAG}
docker push ${REGISTRY_PATH}/deploy:${VERSION_TAG}
When all of the images are pushed successfully, modify the pipeline.py file to use the appropriate image for each pipeline step.
Running and deploying your pipeline
Compile
To compile the pipeline, simply open a terminal and navigate to the azurepipeline/code folder. Run the following command to generate a pipeline in the tar.gz format:
python pipeline.py
Run and deploy
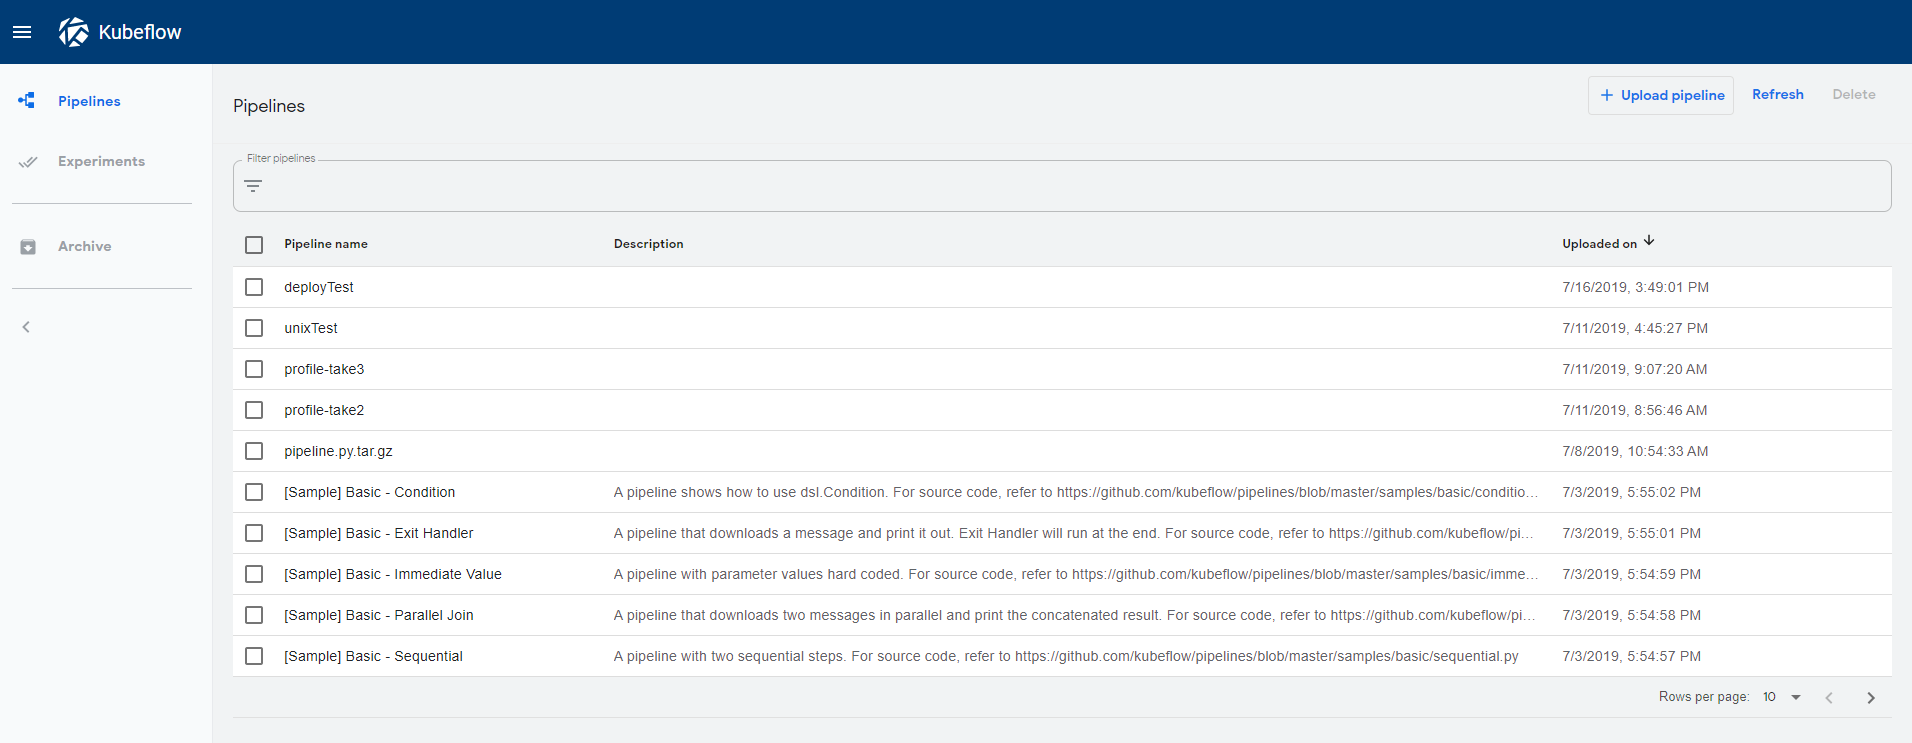
Upload the pipeline.tar.gz file to the pipelines dashboard on your Kubeflow deployment.
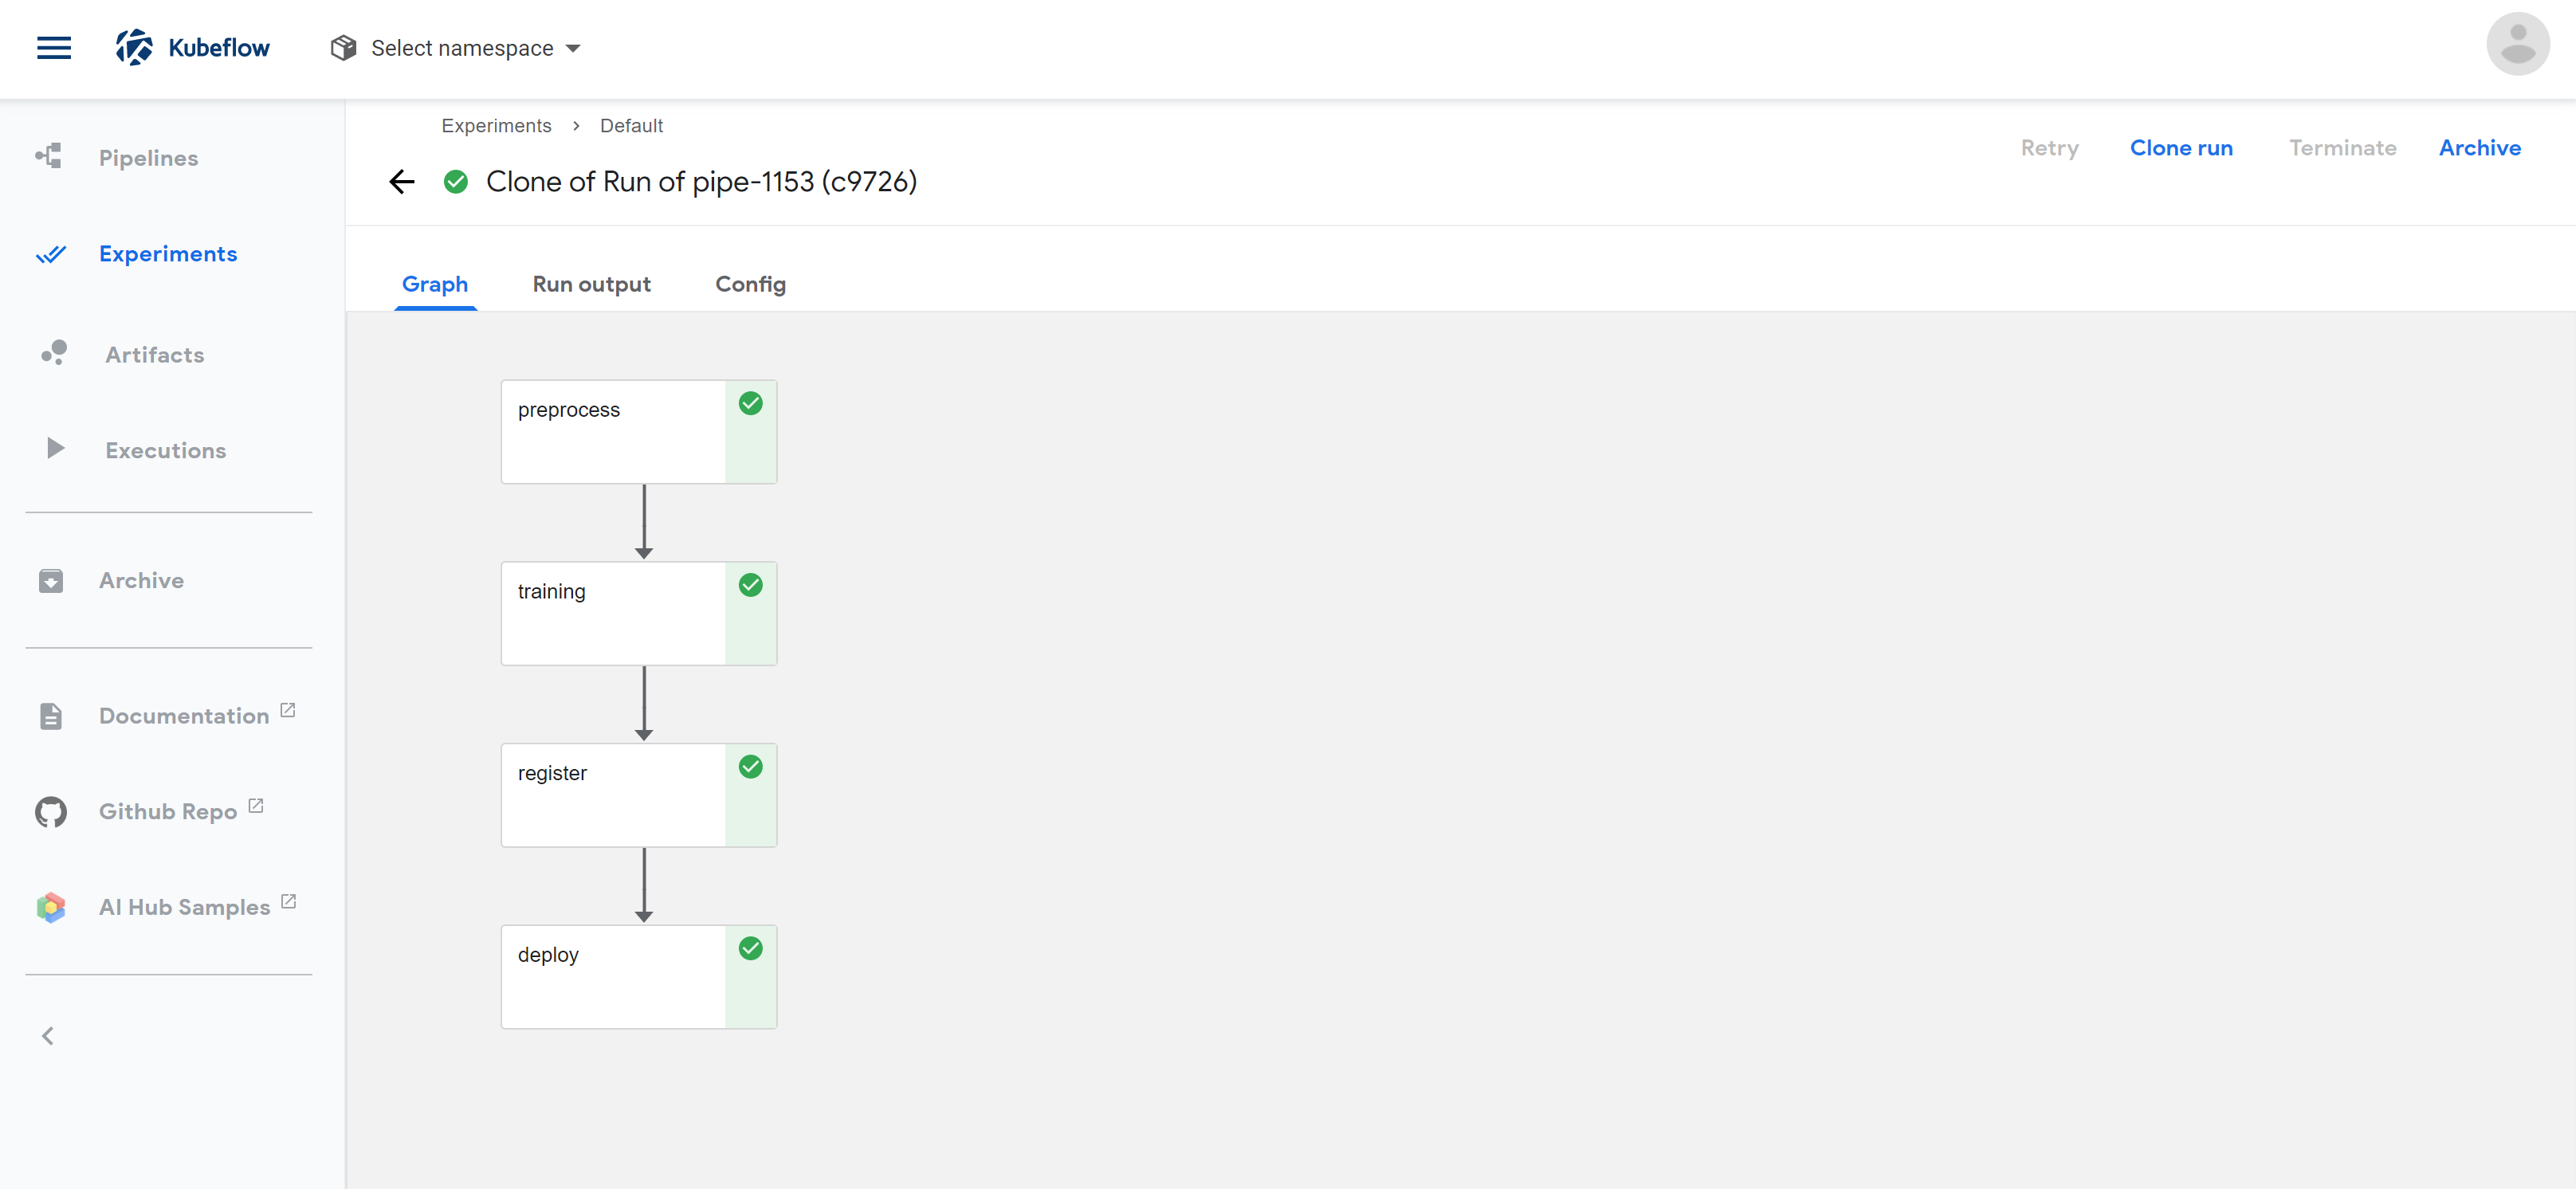
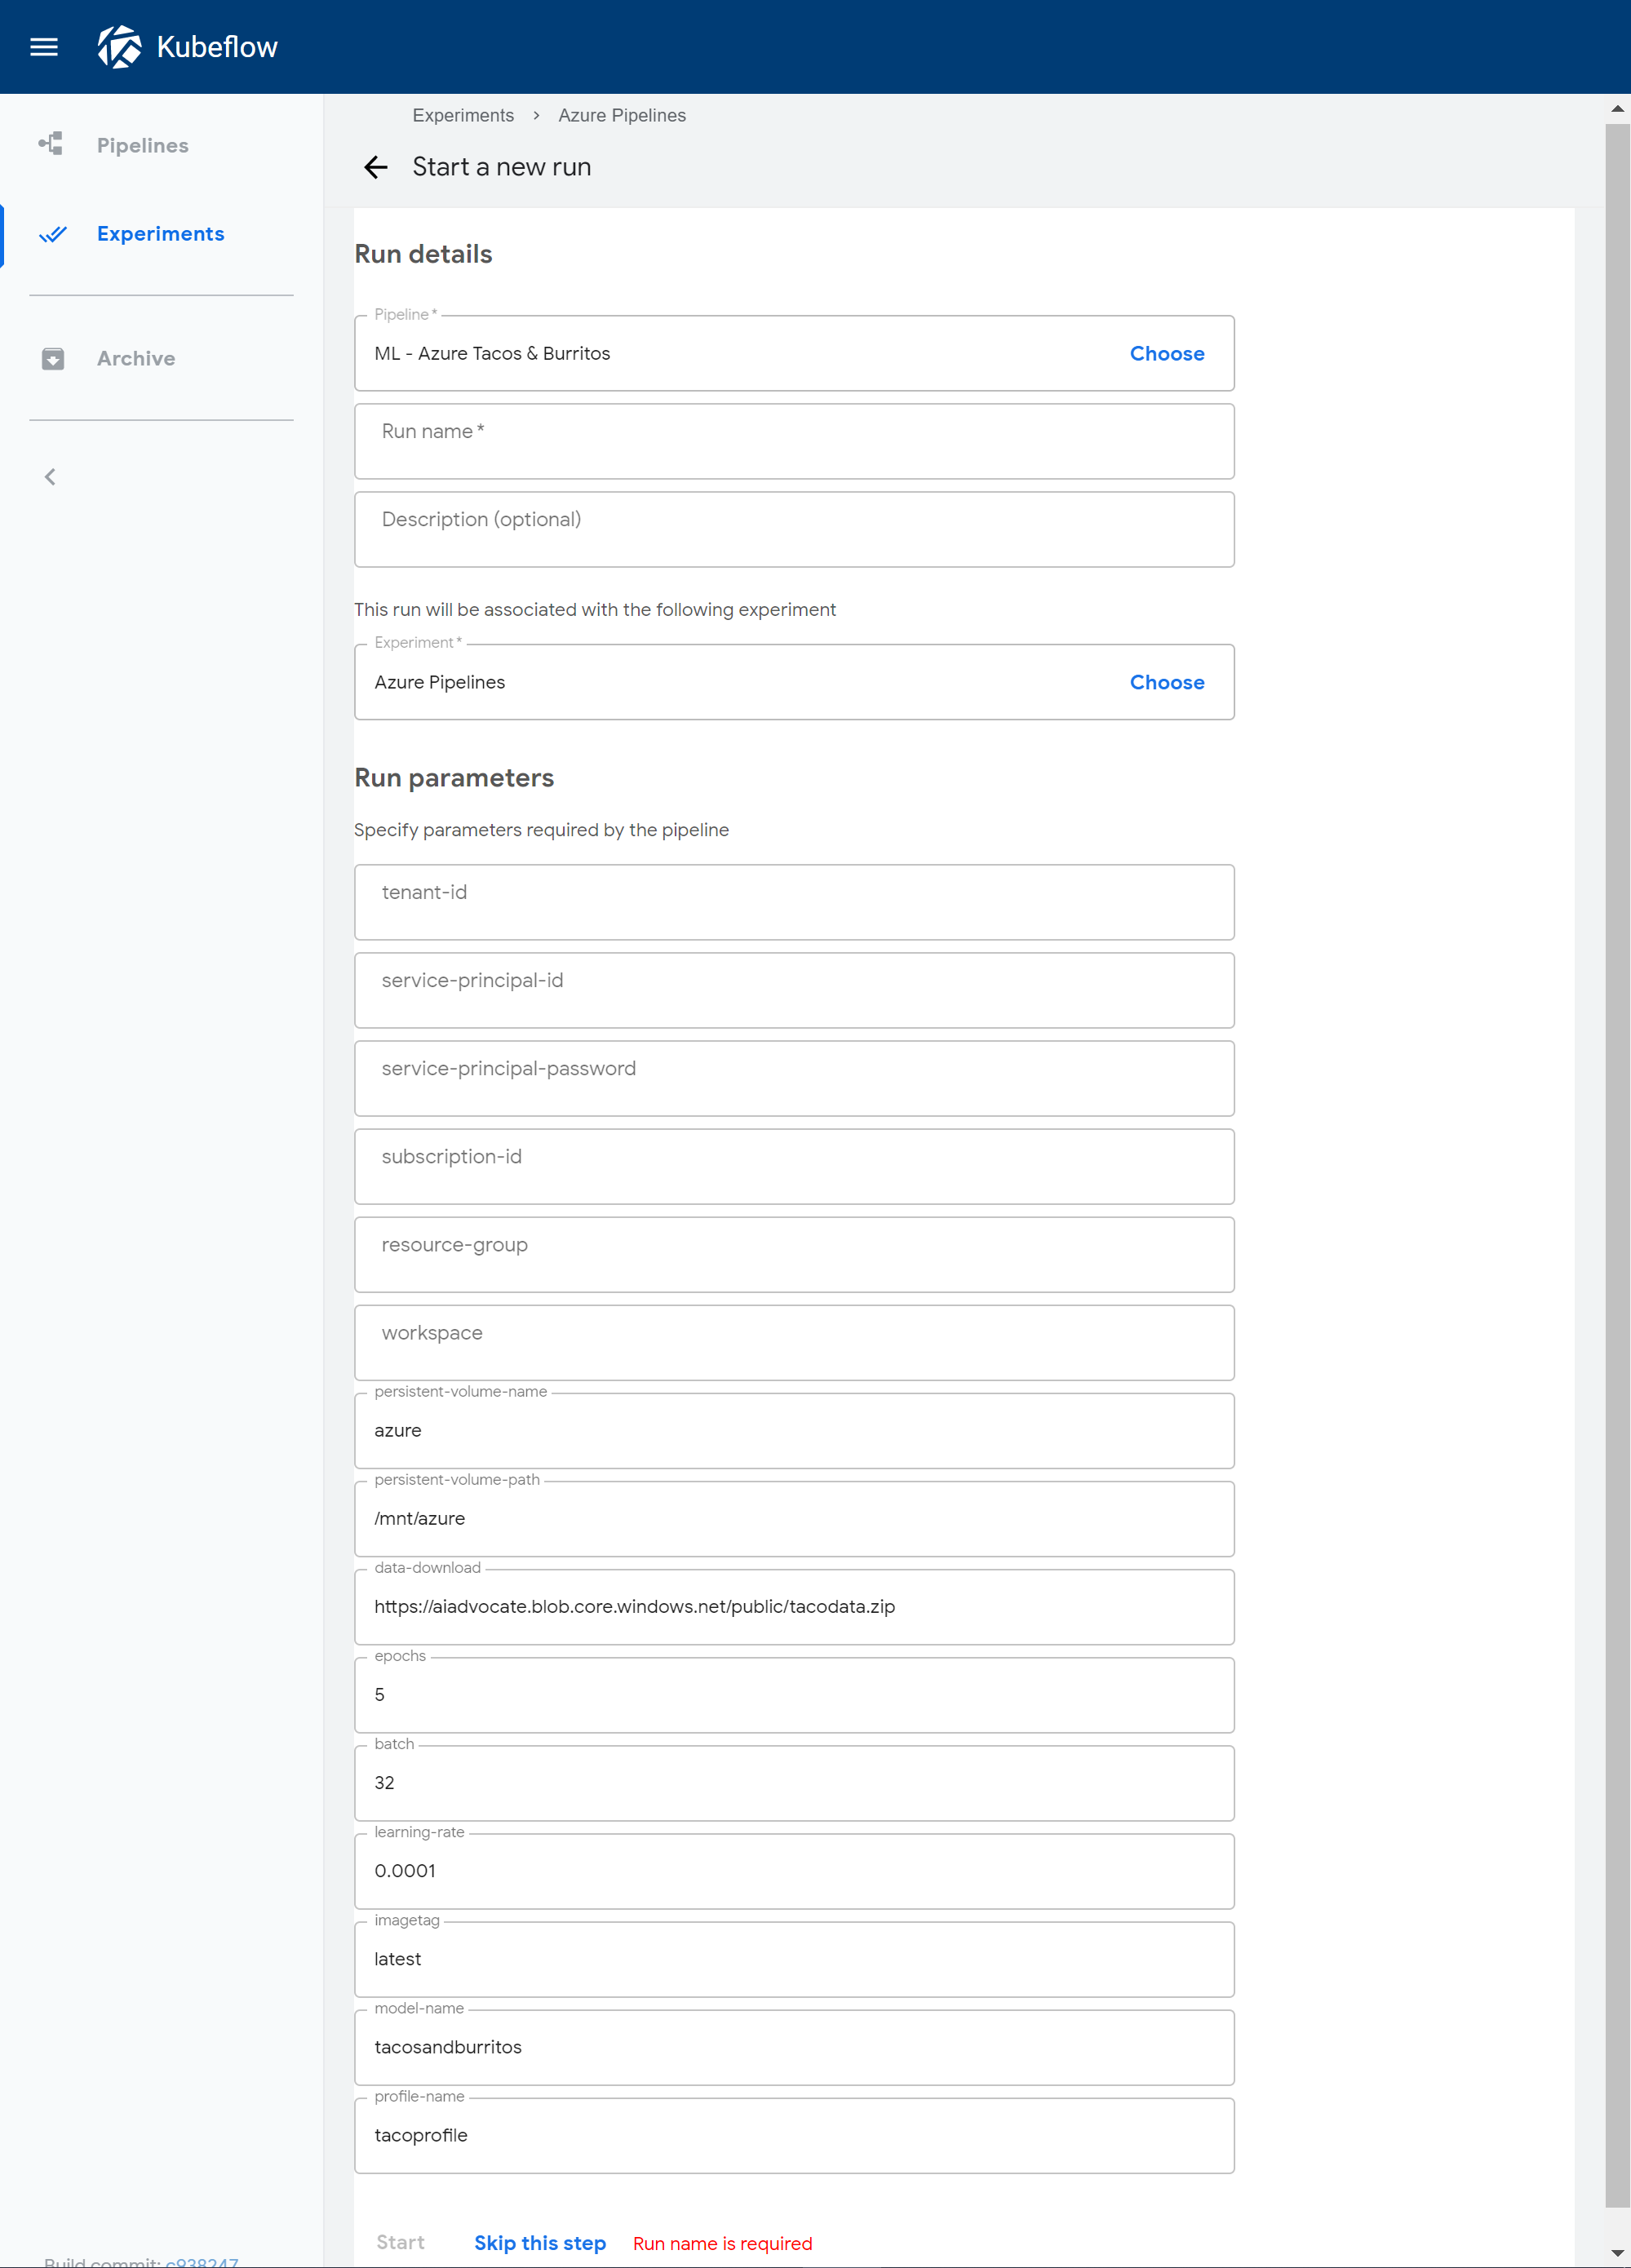
Create an experiment and then create a run using the pipeline you just uploaded.
The finished pipeline should have four completed steps.
Pushing images for scoring
Once your pipeline has finished successfully, you can visit the Azure portal to find your deployment url. Go to your ML workspace dashboard and select “Deployments” from the sidebar. Click on the most recent deployment. You should see a link under “Scoring URI”. You can whatever method you know best to send a GET/POST request with an image of a taco or a burrito to this url and it should return whether or not the image is of a taco or a burrito.
The easiest method is to find a url of an image of a taco or a burrito and append it to your scoring url as follows: <scoring_url>?image=<image_url>
Clean up your Azure environment
When you are done, make sure you delete your resource group to avoid extra charges.
az group delete -n MyResourceGroup
You can optionally choose to delete individual resources on your clusters using the Azure cluster docs.
Next steps
Build your own pipeline using the Kubeflow Pipelines SDK.
Feedback
Was this page helpful?
Glad to hear it! Please tell us how we can improve.
Sorry to hear that. Please tell us how we can improve.
